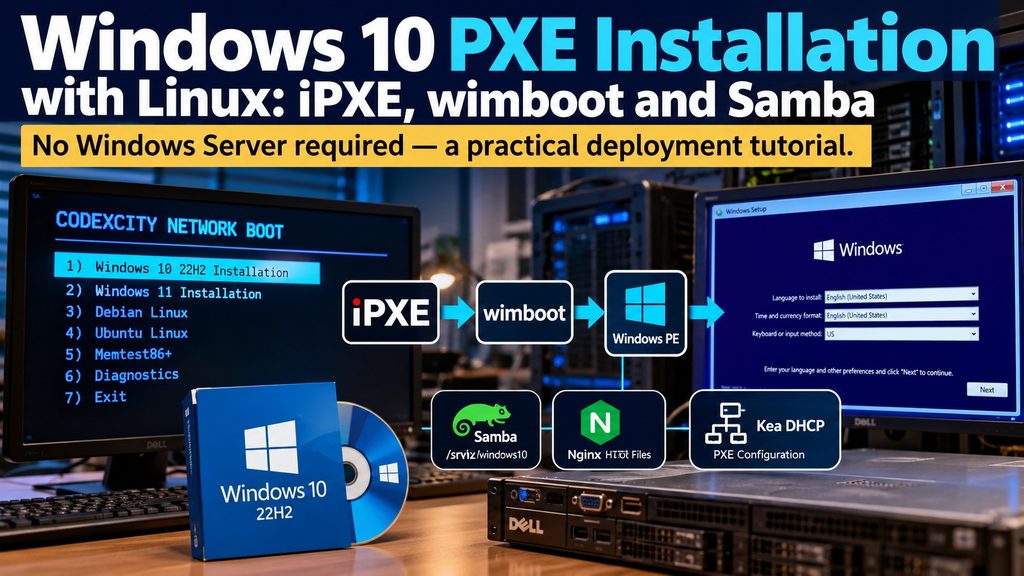
A practical, step-by-step guide to deploying Windows 10 over the network using Debian Linux, Kea DHCP and the official iPXE Windows PE boot method.
Installing Windows over the network is particularly useful when managing multiple computers, refurbishing hardware or maintaining a home lab. Instead of preparing USB installation media for every machine, you can boot a computer directly from the network and launch Windows Setup.
In this tutorial, we’ll build a Windows 10 22H2 PXE installer using an existing Debian Linux server. No Windows Server, Windows Deployment Services (WDS) or Microsoft Deployment Toolkit (MDT) is required.
The result is a custom CODEXCITY NETWORK BOOT menu with a Windows 10 installation option.
1. Our Network Infrastructure
Our environment uses Proxmox VE, with the PXE services running inside a Debian Linux container.
| Component | Configuration |
|---|---|
| Virtualization | Proxmox VE |
| PXE server | Debian Linux LXC |
| DHCP server | Kea DHCP |
| Web server | Nginx |
| File sharing | Samba |
| Network bootloader | iPXE |
| Windows bootloader | wimboot |
| Operating system | Windows 10 22H2 |
| Installation image | install.esd |
Kea DHCP and the PXE server run separately. the DHCP server directs network clients to the appropriate bootloader, while Nginx delivers the PXE scripts and Windows boot files.
Prerequisites: A working DHCP/PXE environment, an iPXE-capable client, a Debian server with Nginx and Samba, and legitimate Windows 10 installation media.
This tutorial focuses on adding Windows installation support to an existing iPXE environment. Initial Kea DHCP configuration and iPXE chainloading are outside its scope.
2. Understanding the Boot Process
The installation follows this sequence:
- The computer boots from its network interface.
- Kea DHCP provides the network configuration and PXE boot information.
- iPXE displays the CODEXCITY NETWORK BOOT menu.
- The Windows 10 entry loads
wimboot,BCD,boot.sdiandboot.wimover HTTP. - Windows PE starts.
- A startup script connects to the Samba share.
- Windows Setup launches using the installation files stored on the Linux server.
The important distinction is that booting Windows PE does not automatically make the complete Windows installation media available.
The Windows installation files must be provided separately, in our case through Samba.
3. Prepare the Windows Installation Files
First, create the directory for the Windows boot files:
sudo mkdir -p /var/www/html/images/windows10Mount your Windows 10 ISO and copy its contents to the installation directory.
For example, if the ISO is located at /tmp/windows10.iso:
sudo mkdir -p /mnt/windows10iso
sudo mkdir -p /srv/windows10

sudo mount -o loop,ro /tmp/windows10.iso /mnt/windows10iso

sudo cp -a /mnt/windows10iso/. /srv/windows10/

sudo umount /mnt/windows10iso
The ISO path above is an example; replace it with the location of your own Windows installation media.
Next, make the Windows PE boot files available through Nginx:
cd /var/www/html/images/windows10

sudo mkdir -p boot sources

sudo cp /srv/windows10/boot/BCD boot/
sudo cp /srv/windows10/boot/boot.sdi boot/
sudo cp /srv/windows10/sources/boot.wim sources/
Download wimboot from the official iPXE project:
sudo wget -O wimboot https://boot.ipxe.org/wimbootVerify the files:
ls -lh wimboot boot/BCD boot/boot.sdi sources/boot.wimOur Windows 10 boot.wim was approximately 438 MB.
Important: We use the original Windows boot.wim. No modification of the image is necessary for this procedure.
4. Configure Samba
Windows PE needs access to the full Windows installation media, including setup.exe and sources/install.esd.
Install Samba if it is not already installed:
sudo apt update
sudo apt install samba
Create a dedicated deployment account if necessary:
sudo adduser pxedeploy
sudo smbpasswd -a pxedeploy
Ensure that the deployment account can read the installation files.
For our deployment, the following share was added to /etc/samba/smb.conf:
[windows10]
    browseable = No
    comment = Windows 10 PXE Installation
    path = /srv/windows10
    valid users = pxedeploy
    read only = yes
    acl allow execute always = yes
The acl allow execute always setting is relevant because files copied from a Windows ISO onto a Linux filesystem may not have Unix executable permissions.
We encountered an Access is denied error when attempting to launch an executable from the Samba share. Allowing execution through Samba resolved that particular permission problem.
Validate the configuration:
testparm -sThen reload Samba:
sudo systemctl reload smbdThe installation files are now available at:
\\<ip-address>\windows105. Create the Windows PE Startup Script
This is the essential part of the solution.
Instead of modifying boot.wim, we use the file injection capability of wimboot to supply startup files directly to Windows PE.
Create /var/www/html/images/windows10/install.bat:
cd /var/www/html/images/windows10

sudo tee install.bat > /dev/null <<'EOF'
@echo off
wpeinit

echo Connecting to Windows 10 installation share...
net use Z: \\<ip-address>\windows10 /user:pxedeploy *

if errorlevel 1 (
    echo Network connection failed.
    pause
    exit /b 1
)

cd /d Z:\
setup.exe
EOF
Let’s examine what the script does.
wpeinit initializes Windows PE, including network services and Plug and Play device initialization.
The net use command connects to the Samba share and maps it to drive Z:. The asterisk instructs Windows to request the password interactively, rather than storing credentials in the script.
Finally, setup.exe launches Windows Setup from the network installation media.
This means the installer has access to the complete Windows installation source rather than only the files included in boot.wim.
6. Create winpeshl.ini
Windows PE supports a startup configuration file named winpeshl.ini.
Create it on the PXE server:
sudo tee winpeshl.ini > /dev/null <<'EOF'
[LaunchApps]
"install.bat"
EOF
This tells Windows PE to execute our deployment script at startup.
The key advantage is that both files can be injected into Windows PE during network boot.
We do not need to mount, edit, rebuild or replace the original boot.wim.
7. Configure the Windows iPXE Script
Create /var/www/html/images/windows10/boot.ipxe:
#!ipxe

echo ==========================================
echo       Windows 10 22H2 PXE Boot
echo ==========================================

set base http://<ip-address>/images/windows10

kernel ${base}/wimboot
initrd ${base}/install.bat install.bat
initrd ${base}/winpeshl.ini winpeshl.ini
initrd ${base}/boot/BCD BCD
initrd ${base}/boot/boot.sdi boot.sdi
initrd ${base}/sources/boot.wim boot.wim

boot
The two most important lines are:
initrd ${base}/install.bat install.bat
initrd ${base}/winpeshl.ini winpeshl.ini
These provide the startup files to Windows PE through wimboot.
The remaining lines load the standard Windows boot components.
This is the approach described in the official iPXE Windows PE documentation.
8. Add Windows 10 to the Main PXE Menu
Our existing CODEXCITY NETWORK BOOT menu is served from:
/var/www/html/boot.ipxeThe Windows 10 menu entry points to the dedicated Windows boot script.
For an existing menu, add an appropriate menu item and the following target:
:windows10
chain http://<ip-address>/images/windows10/boot.ipxe
goto start
The goto start line returns to our existing menu label if the chainloaded script exits.
This allows us to maintain a central PXE menu for multiple operating systems and recovery tools.
9. Test the HTTP Boot Files
Before attempting a network boot, verify that Nginx serves the required files.
curl -I http://<ip-address>/images/windows10/boot.ipxe
curl -I http://<ip-address>/images/windows10/install.bat
curl -I http://<ip-address>/images/windows10/winpeshl.ini
curl -I http://<ip-address>/images/windows10/wimboot
Each request should return HTTP status 200 OK.
Also verify that the Windows boot files are accessible:
curl -I http://<ip-address>/images/windows10/boot/BCD
curl -I http://<ip-address>/images/windows10/boot/boot.sdi
curl -I http://<ip-address>/images/windows10/sources/boot.wim
Once all files are accessible, the server is ready for testing.
10. Boot Windows 10 over the Network
We tested the installation process on a Dell computer using its network boot capability.
The procedure is straightforward:
- Enable network/PXE boot in the computer’s firmware.
- Boot from the network interface.
- Wait for the CODEXCITY NETWORK BOOT menu.
- Select Windows 10 22H2 Installation.
- Allow iPXE to download Windows PE.
- Enter the Samba deployment password when requested.
- Continue through the Windows Setup interface.
During our successful test, Windows PE automatically displayed:
Connecting to Windows 10 installation share...
Type the password for \\<ip-address>\windows10:
This confirmed that the injected startup script was executing correctly.
After authentication, the installation files were available through the network share and Windows Setup could be launched.
Note: Reaching Windows Setup confirms the network deployment mechanism is working. A complete installation should also be tested through disk selection, image application and the first Windows boot before considering the entire deployment process validated.
11. Troubleshooting Lessons
Our initial attempts took considerably longer than expected. Several observations are worth documenting.
Windows PE boots, but Setup asks for a driver
A missing-media-driver message does not necessarily mean the computer needs a storage controller driver.
In our case, Windows PE detected the internal disk and could access the network. The problem was that the Windows installation source was not being supplied through a proper startup workflow.
Booting boot.wim alone does not automatically mount the full Windows ISO.
Check whether install.esd is accessible
From Windows PE, after mapping the Samba share, use:
dism /Get-WimInfo /WimFile:Z:\sources\install.esdIn our test, DISM successfully listed seven Windows 10 editions, including Windows 10 Pro at index 6.
This confirmed that the installation image was accessible and readable over the network.
Access is denied when executing setup.exe
Check Samba permissions and the execute-access configuration.
For our share, this setting was useful:
acl allow execute always = yesReload Samba after modifying the configuration.
Setup starts incorrectly or immediately exits
Avoid repeatedly launching different copies of setup.exe from an already-running Windows Setup environment.
Instead, start Windows PE with a defined deployment script that connects to the network installation source before launching Setup.
This was the key architectural improvement in our final configuration.
PXE does not start at all
Before debugging DHCP or iPXE configuration, verify basic network connectivity, including the Ethernet cable.
One of our test interruptions turned out to be a disconnected LAN cable!
12. Back Up the Working Configuration
Once the deployment works, preserve the configuration.
On the PXE server:
cd /var/www/html/images/windows10

sudo tar -czf /root/codexcity-win10-pxe-working.tar.gz \
  boot.ipxe install.bat winpeshl.ini
This creates a small archive containing the three essential configuration files.
The original Windows installation media and boot.wim should also be preserved separately.
For disaster recovery, remember that the complete deployment additionally depends on Nginx, Samba, DHCP and the wimboot binary.
13. Conclusion
We now have a Windows 10 network installation workflow running entirely on Linux infrastructure.
The solution combines:
- Kea DHCP for network boot configuration.
- iPXE for the boot menu and HTTP downloads.
- wimboot for starting Windows PE.
- Nginx for serving boot files.
- Samba for providing the Windows installation media.
- winpeshl.ini and install.bat for starting the installation process.
The most important lesson is simple: you don’t need to modify the Windows boot image to launch a network-based Windows installer.
By injecting a small startup script with wimboot, we can connect Windows PE to the installation source and start Windows Setup using the existing infrastructure.
This provides a reusable foundation for future Windows deployment projects in the Codexcity home lab.
References
- iPXE — Windows PE Booting
- iPXE — wimboot
- Microsoft Learn — WinPE: Mount and Customize
- Microsoft Learn — WinPE Startup Scripts
Why Windows 10?
I chose Windows 10 for this tutorial because I was refurbishing an older laptop. Although Windows 11 is the current Microsoft desktop operating system in 2026, Windows 10 remains useful for testing and refurbishing older hardware.
The same PXE deployment principles can also be applied to Windows 11.