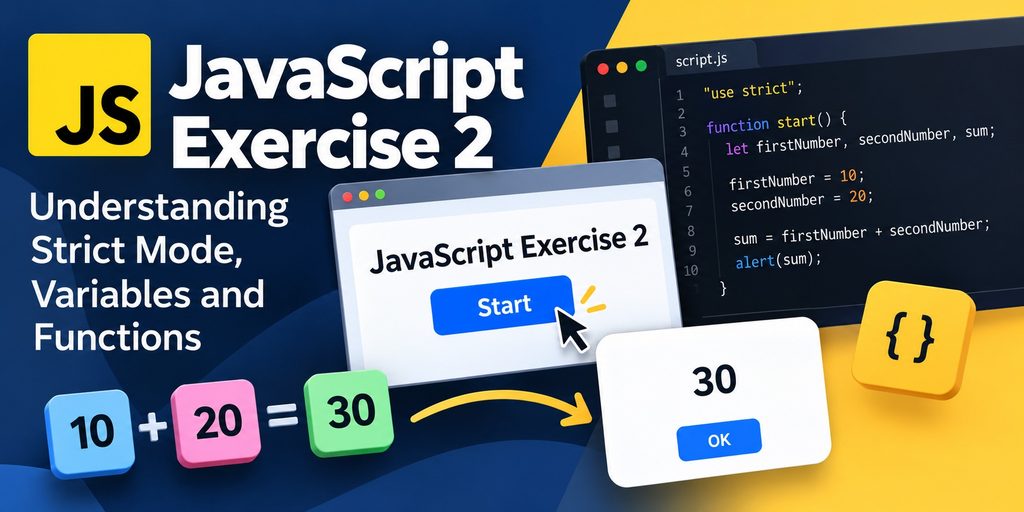
In our previous JavaScript exercise, we created a simple application that displayed a message using the alert() function. Now it is time to take things a little further. In this second exercise, we will create a JavaScript application that adds two numbers together and displays the result in a popup window. The application introduces several important JavaScript concepts, including variable declarations, arithmetic operations, functions, Strict Mode and interaction between HTML and JavaScript.
By the end of this tutorial, you will understand how these concepts work together to create a functioning web application.
index.html
<!DOCTYPE html>
<html lang="en">
<head>
    <meta charset="UTF-8">
    <title>Strict Mode</title>
    <script src="script.js"></script>
</head>
<body>
<h1>JavaScript Exercise 2</h1>
<button type="button" onclick="start()">Start</button>
</body>
</html>
script.js
"use strict";

function start(){
    let firstNumber,secondNumber, sum;
    firstNumber = 10;
    secondNumber = 20;
    sum=firstNumber + secondNumber;
    alert(sum);
}
1. Creating the HTML Document
We start by creating a file called index.html.
<!DOCTYPE html>
<html lang="en">
<head>
    <meta charset="UTF-8">
    <title>Strict Mode</title>
    <script src="script.js"></script>
</head>
<body>
    <h1>JavaScript Exercise 2</h1>
    <button type="button" onclick="start()">Start</button>
</body>
</html>
This HTML document provides the structure of our application.
Let’s examine the most important elements.
The DOCTYPE Declaration
<!DOCTYPE html>This declaration tells the browser that the document uses HTML5.
It ensures that the browser renders the page using standards mode rather than the older quirks mode.
Linking an External JavaScript File
<script src="script.js"></script>The script element instructs the browser to load and execute the JavaScript code contained in script.js.
In this example, both files are located in the same directory.
Separating JavaScript from HTML is generally good practice because it improves readability, maintainability and code organization.
Creating a Button
<button type="button" onclick="start()">Start</button>This creates a button labeled Start.
The onclick attribute defines what happens when the user clicks the button.
In our example, clicking the button executes the JavaScript function named start().
Notice the parentheses after the function name.
start()The parentheses indicate that we want to call the function.
The function itself is defined in our external JavaScript file.
2. Writing the JavaScript Code
Next, create a file named script.js.
Add the following code:
"use strict";

function start() {
    let firstNumber, secondNumber, sum;

    firstNumber = 10;
    secondNumber = 20;

    sum = firstNumber + secondNumber;

    alert(sum);
}
When the user clicks the Start button, the application calculates:
10 + 20 = 30The browser then displays an alert containing the number:
30
Let’s examine the JavaScript code in more detail.
3. What Is JavaScript Strict Mode?
The first line of our JavaScript file is:
"use strict";This statement enables JavaScript Strict Mode.
Strict Mode was introduced with ECMAScript 5 in 2009.
Its purpose is to make JavaScript code more predictable by preventing certain unsafe operations and converting some otherwise silent errors into explicit errors.
JavaScript was originally designed to be a relatively forgiving programming language. Unfortunately, this flexibility can sometimes make programming mistakes difficult to detect.
Strict Mode addresses several of these problems.
Example Without Strict Mode
Consider the following JavaScript code:
function start() {
    firstNumber = 10;
    alert(firstNumber);
}
Notice that we never declared the variable firstNumber.
In a traditional JavaScript script without Strict Mode, assigning a value to an undeclared identifier can create a property on the global object.
The browser may therefore execute the code without reporting an error.
This behavior can lead to unexpected bugs.
Example With Strict Mode
Now consider the same code with Strict Mode enabled:
"use strict";

function start() {
    firstNumber = 10;
    alert(firstNumber);
}
This time, JavaScript throws a ReferenceError when the function attempts to assign a value to the undeclared variable.
Strict Mode helps us detect this programming mistake immediately.
Why Should We Use Strict Mode?
Strict Mode provides several advantages.
- It prevents accidental creation of global variables through assignments to undeclared identifiers.
- It makes certain silent programming errors visible.
- It prohibits some problematic language constructs.
- It makes JavaScript behavior more predictable.
- It encourages cleaner programming practices.
Important: Strict Mode does not detect every programming mistake. It also does not provide static type checking like TypeScript.
Modern JavaScript modules automatically execute in Strict Mode, so an explicit "use strict"; statement is unnecessary inside a module.
However, for traditional JavaScript scripts like the one in this exercise, explicitly enabling Strict Mode remains useful.
4. Understanding JavaScript Functions
Our application contains the following function:
function start() {
    // JavaScript instructions
}
A function is a reusable block of code designed to perform a particular task.
The keyword function tells JavaScript that we are declaring a function.
The name start identifies the function.
The parentheses () contain the function’s parameters. In this example, the function does not require any parameters.
The curly braces {} define the function body.
JavaScript executes the instructions inside the function when it is called.
In our application, the function is called when the user clicks the HTML button.
An important detail is that defining a function does not automatically execute its contents.
The function must first be called.
5. Declaring Variables With let
Inside our function, we declare three variables:
let firstNumber, secondNumber, sum;A variable is a named location used to hold a value while a program executes.
The let keyword declares variables with block scope.
In our example, we declare three variables in a single statement.
These variables are:
firstNumber: Stores the first number.
secondNumber: Stores the second number.
sum: Stores the result of the calculation.
At this point, all three variables have the value undefined because we have declared them without assigning values.
Declaring Multiple Variables
JavaScript allows multiple variables to be declared using a single let statement.
For example:
let firstNumber, secondNumber, sum;This is equivalent to:
let firstNumber;
let secondNumber;
let sum;
Both approaches are valid.
The second approach may improve readability when working with many variables.
6. Assigning Values to Variables
Next, we assign values to our variables.
firstNumber = 10;
secondNumber = 20;
The equals sign = is JavaScript’s assignment operator.
It assigns the value on the right side to the variable on the left side.
It is important to understand that the assignment operator is different from the mathematical equality operator.
In JavaScript:
firstNumber = 10;assigns the value 10.
Meanwhile:
firstNumber === 10;compares the variable with the number 10 using strict equality.
The comparison produces a Boolean value, either true or false.
Declaring and Initializing Variables
We could also simplify our code by declaring and initializing the variables simultaneously.
let firstNumber = 10;
let secondNumber = 20;
This approach is commonly used in JavaScript applications.
7. Performing Arithmetic Operations
Now we reach the actual calculation.
sum = firstNumber + secondNumber;JavaScript evaluates the expression on the right side of the assignment operator.
Since our variables contain the numbers 10 and 20, JavaScript performs the following calculation:
sum = 10 + 20;The result is:
sum = 30;The variable sum now contains the numeric value 30.
JavaScript supports several arithmetic operators.
| Operator | Description | Example | Result |
|---|---|---|---|
+ | Addition | 10 + 20 | 30 |
- | Subtraction | 20 - 10 | 10 |
* | Multiplication | 10 * 20 | 200 |
/ | Division | 20 / 10 | 2 |
% | Remainder | 20 % 3 | 2 |
** | Exponentiation | 2 ** 3 | 8 |
These operators form the foundation of mathematical calculations in JavaScript.
One detail worth remembering is that the + operator can also concatenate strings.
For example:
let firstNumber = "10";
let secondNumber = "20";

let sum = firstNumber + secondNumber;

alert(sum);
In this case, the result is:
1020Because both values are strings, JavaScript concatenates them instead of performing numerical addition.
This is an important distinction when processing user input.
8. Displaying the Result With alert()
The final instruction in our function is:
alert(sum);The alert() function displays a browser dialog containing a message.
In our example, the value of sum is 30.
Therefore, the browser displays a popup containing:
30The user must dismiss the dialog before continuing to interact with the page.
Although alert() is useful for learning and simple demonstrations, modern web applications generally display results directly inside the webpage.
We will explore this approach in future exercises.
9. Understanding Semicolons in JavaScript
You may have noticed that several JavaScript statements end with a semicolon.
For example:
firstNumber = 10;
secondNumber = 20;
sum = firstNumber + secondNumber;
The semicolon indicates the end of a statement.
However, JavaScript does not always require developers to write semicolons explicitly.
JavaScript implements a mechanism called Automatic Semicolon Insertion, commonly abbreviated as ASI.
This mechanism allows the JavaScript engine to insert semicolons automatically in certain situations.
For example, the following code works:
let firstNumber = 10
let secondNumber = 20
let sum = firstNumber + secondNumber

alert(sum)
Nevertheless, Automatic Semicolon Insertion does not mean that JavaScript inserts a semicolon after every line.
Some expressions can continue onto the next line, which can occasionally produce unexpected behavior.
For beginners, explicitly writing semicolons is a reasonable convention.
It makes statement boundaries clear and helps establish a consistent coding style.
10. Understanding Variable Scope
There is another important detail in our example.
Notice that our variables are declared inside the start() function.
function start() {
    let firstNumber, secondNumber, sum;
}
These variables are local to the function.
They cannot be accessed directly from outside that function.
For example:
"use strict";

function start() {
    let firstNumber = 10;
}

alert(firstNumber);
This code produces a ReferenceError.
The variable firstNumber exists only within the scope where it was declared.
This is useful because it prevents unrelated parts of an application from accidentally modifying the same variables.
In larger applications, controlling variable scope is essential for maintaining reliable and understandable code.
11. Improving Our JavaScript Code
Our original application works perfectly for its intended purpose.
However, we can make the code slightly shorter.
Consider the following version:
"use strict";

function start() {
    let firstNumber = 10;
    let secondNumber = 20;

    let sum = firstNumber + secondNumber;

    alert(sum);
}
Here, we declare and initialize the variables in the same statements.
We could also use const instead of let.
"use strict";

function start() {
    const firstNumber = 10;
    const secondNumber = 20;

    const sum = firstNumber + secondNumber;

    alert(sum);
}
The const keyword declares a variable whose binding cannot be reassigned after initialization.
Since our variables are assigned only once, const is an appropriate choice.
A useful convention in modern JavaScript development is to use const by default and switch to let when reassignment is necessary.
For this exercise, however, using let is perfectly valid and helps demonstrate how variables are declared and assigned separately.
12. How the Application Executes
Let’s review what happens when a visitor opens our webpage.
Step 1: The browser loads the HTML document.
The browser begins processing index.html.
Step 2: The browser loads the JavaScript file.
The following element instructs the browser to load script.js:
<script src="script.js"></script>The browser executes the script and registers the start() function.
Because the script is a traditional script rather than a module, the top level function declaration makes start() available to our inline HTML event handler.
Step 3: The browser displays the webpage.
The visitor sees the heading and the Start button.
Step 4: The visitor clicks Start.
The button executes:
start();Step 5: JavaScript creates the local variables.
let firstNumber, secondNumber, sum;Step 6: JavaScript assigns the values.
firstNumber = 10;
secondNumber = 20;
Step 7: JavaScript calculates the sum.
sum = firstNumber + secondNumber;Step 8: JavaScript displays the result.
alert(sum);The visitor sees the number 30.
Our application has successfully executed.
13. Try It Yourself
The best way to learn programming is to experiment.
Try modifying the application.
Exercise A: Change the numbers
Change the values of firstNumber and secondNumber.
Does the application display the correct result?
Exercise B: Perform multiplication
Replace:
sum = firstNumber + secondNumber;with:
sum = firstNumber * secondNumber;What happens?
Exercise C: Experiment With Strict Mode
Remove the declaration of firstNumber and assign it a value directly.
Observe the error in your browser’s developer console.
Then remove "use strict"; and compare the behavior.
Exercise D: Experiment With Strings
Replace the numeric values with strings.
firstNumber = "10";
secondNumber = "20";
What happens when you add them together?
Understanding why JavaScript produces a different result is an important step toward mastering the language.
Conclusion
In this second JavaScript exercise, we created a simple calculator that adds two numbers and displays the result.
Although the application contains only a few lines of JavaScript, it demonstrates several fundamental programming concepts.
We learned how to enable Strict Mode, declare variables using let, assign values, perform arithmetic operations, create functions and connect JavaScript functionality to an HTML button.
We also explored variable scope, Automatic Semicolon Insertion and the difference between let and const.
These concepts will appear repeatedly as we develop more advanced JavaScript applications.
In the next exercise, we can improve our application by allowing users to enter their own numbers and displaying the calculated result directly on the webpage instead of using an alert dialog.
Keep experimenting, keep coding and keep learning!