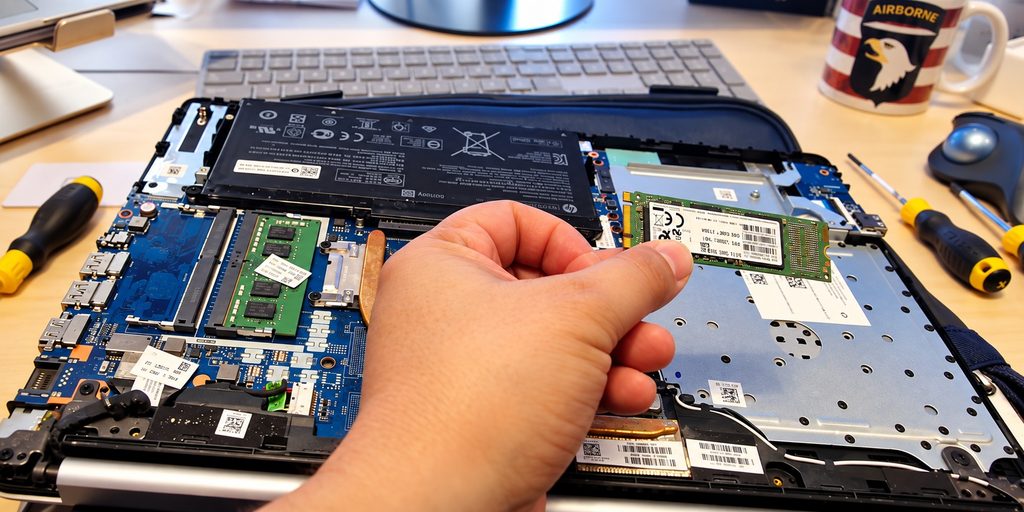
I recently received an HP 15 db0115nb laptop from a customer with a storage problem. The HP 15 db0000 family is an entry level consumer laptop, and this particular machine is equipped with an AMD A9 9425 CPU with integrated Radeon R5 graphics and 8 GB of RAM. Its benchmark results are fairly modest, but the customer only needs it for basic everyday tasks. For that purpose, the hardware is still adequate.
During diagnosis, the original drive reported a S.M.A.R.T. capability issue, indicating a problem with the drive and making continued use of it questionable. The laptop itself was still usable, so replacing the entire computer would have been unnecessary.
Opening the laptop
Getting inside modern laptops is often half the challenge. Several screws on this HP are hidden underneath rubber strips on the bottom of the laptop. I first had to carefully remove these rubber strips to access the screws underneath. After removing all the screws, the bottom cover still had to be separated from the chassis. Instead of using a metal screwdriver and risking scratches or damage to the plastic, I used an old credit card. By carefully working the card around the edge of the laptop, I could release the plastic clips one by one and remove the bottom cover. A plastic card is thin enough to get between the panels while being much less likely to damage the laptop than a metal tool.
Replacing the storage drive
For the replacement I had an SK Hynix HFS256G39TNH available. This is a 256 GB M.2 2280 SATA SSD. The 2280 designation refers to its physical dimensions: 22 mm wide and 80 mm long. One important thing to understand about M.2 is that it describes the form factor and connector standard, not necessarily the storage protocol. An M.2 SSD can use SATA or PCIe/NVMe. This particular SK Hynix drive uses the SATA III interface, with a theoretical maximum transfer rate of 6 Gb/s. It is therefore an M.2 2280 SATA III SSD, not an NVMe SSD. Checking both the physical M.2 format and the supported interface is important before installing a replacement drive in a laptop.
An unexpected problem with the SSD screw
here was one small mechanical problem during the installation. The screw securing the M.2 SSD had disappeared. In fact, when the customer handed over the laptop, we could already hear the SSD moving around freely inside the laptop. I used an M2 × 3 mm laptop screw to fasten the SSD properly again. I also applied a small amount of Loctite Blue threadlocker to help keep the screw securely in place.
Installing Windows 10
With the SSD installed and secured, I could move on to the software side of the repair. I installed Windows 10 on the replacement SSD and brought the laptop back to a clean, working state. Windows 10 is a natural match for this generation of laptop. Windows 11 has stricter hardware requirements, so installing the newest version of Windows is not automatically the best choice for every older computer. The important objective here was to return a reliable and usable machine to the customer.
A successful repair
After installing the SSD and Windows 10, the HP laptop was operational again. What I enjoyed about this repair was that it involved several different aspects of computer repair. I had to carefully disassemble the laptop, remove the rubber strips hiding the screws, open the chassis without damaging it, identify the correct type of M.2 storage, solve the mounting problem with the SSD screw and finally reinstall the operating system. Fortunately, thanks to the laptop’s existing Windows digital license, Windows automatically recognized the hardware and activated successfully after the installation.